Tuesday, December 27, 2011

Emmalynn’s Tree

Today my mom and dad came over to help Lan paint Em’s room. I busied myself putting away Christmas decorations since I knew I should be around all of the fumes. I suppose having other people paint your house and not having to help is a perk to being pregnant :) It is amazing how much a simple coat of paint can do for a room. It looked so much brighter and happier with it’s light blue walls.

I have played around with a lot of different ideas for how to decorate her room, and one reoccurring theme was kind of nature themed, but girly. So I decided that I wanted to paint a white tree where her crib was going to go. I knew that I didn’t want to hang anything over her crib (living in earth quake country taught me that), but I wanted something cute. I found an idea on pinterest, and Lan helped me execute my plan.

A normal person could use a regular overhead and a transparency… but not us. Lan had conveniently hacked a overhead projector and a computer recently to make an digital projector. What is on top of the overhead is actually the screen from a computer. We hooked his laptop up to the whole contraption so that it could project whatever we wanted.

Photo Dec 27, 6 30 57 PM

After we got the size and spot that we wanted, I began to trace the outline of the tree with a pencil. I traced just inside the tree so that when I painted, I would cover the pencil marks.

Photo Dec 27, 6 34 35 PM

Then I got painting. I started at the top and worked my way down so that I wouldn’t smear.

Photo Dec 27, 7 51 23 PM

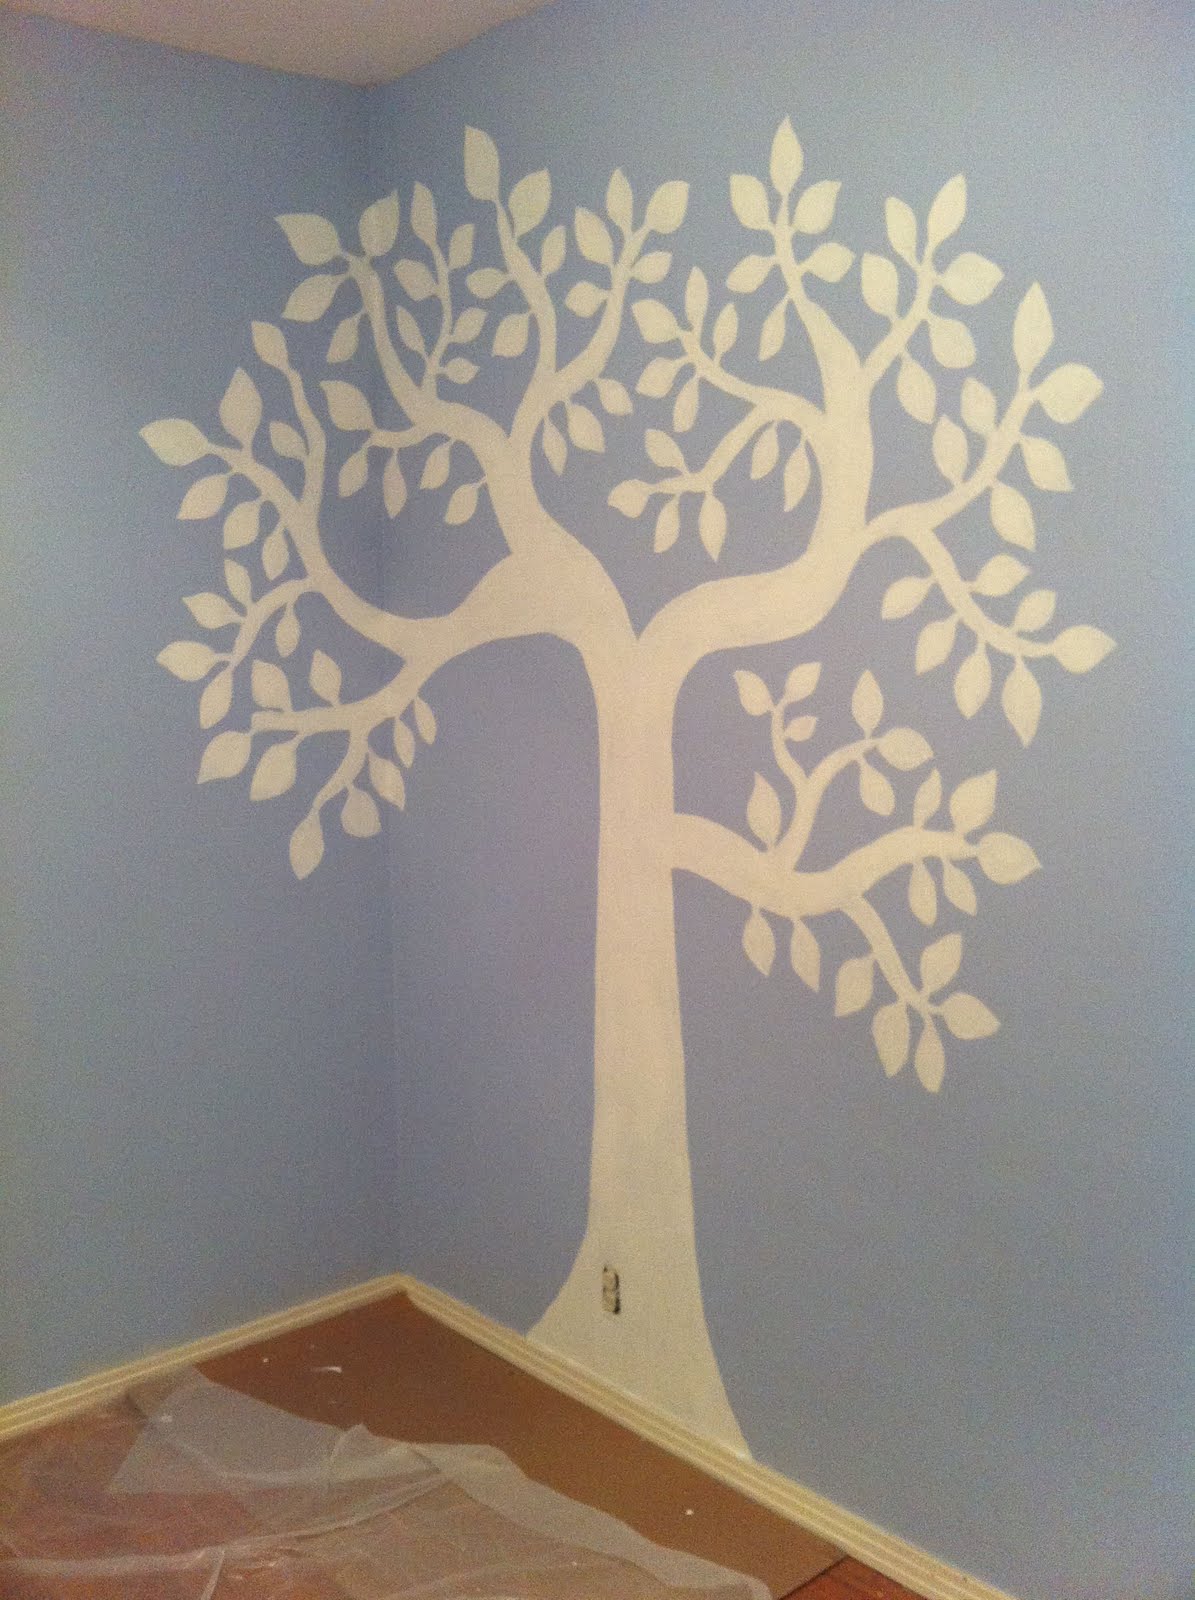
It only took about one cup of paint and about two hours to paint the whole tree. I love how it turned out. I can’t wait for the trim to get painted (our last painting step) so we can move everything in and get it all set up.

Photo Dec 27, 10 42 57 PM

Friday, December 23, 2011

Christmas Gifts in Mass

While thinking of the gifts I wanted my kids to make for their parents, I started searching for ideas online.  I wanted something cheap, easy, and I needed it fast.  I have been a tad last minute lately.  Didn’t want to waste my time on something that was cheesy, but something that they would pull out every year.  I decided to have the kids make their parents Christmas coasters.

I have 17 kids and I decided to have each kid make 3.  It was affordable and they turned out super cute. 

Materials:

tiles (I picked mine up at Home Depot)

modge podge or Elmer's all purpose if you are cheap like me

acrylic spray

paper (either photos, pretty paper, or paper to draw on)

I first cut out paper, slightly smaller than my tile and had the kids draw pictures on them.  If you are doing this from one adult to another, you would just cut out your pictures or pretty paper to the correct size.  Then you paint your glue on the blank tile.

Photo Dec 13, 7 22 31 PMPhoto Dec 14, 12 56 35 PM

Place the picture in the center of your tile, and coat again with glue.  Do a fairly thick layer and be sure that you get the edges really well.  You can see from the picture below how white it will look.  It dries clear, so don’t worry.

Photo Dec 14, 12 58 05 PMPhoto Dec 14, 1 00 09 PM

Just let them dry, then spray with clear acrylic spray to seal them and make them waterproof.

Photo Dec 20, 10 08 28 AM

They really looked impressive, and if I hadn’t already started making other presents for friends, I would have made adult versions of these for them. 

Bam!  Impressive keepsakes. 

Friday, December 16, 2011

Some Christmas Cheer

It is hard to believe that we have owned our home for a year now.  We got our keys last December 10.  Of course, I still decorated for Christmas last year… but this year feels like the first real Christmas in our house.  Unfortunately…. I still don’t have the energy to do a ton… but this time for a completely different reason.  One thing I did do, was string some ribbon across the shutters that divide our living room and den, and then hang ornaments from it.  It really helped festive up our house. 

Photo Nov 30, 9 49 24 PM

We had wanted to put lights up on the outside of our house this year, but time got away from us, so we went the cheater way and scotch taped some lights to our front window :)

The tree is finally decorated, the nativity set is on the table, random decorations are littered though the house, and it is beginning to feel a lot like Christmas… which is good considering it is only a week away.


Photo Dec 16, 9 15 41 PM

I’m currently listening to music in front of the fire, looking at my tree, and happily digesting the cold pizza I just ate.  Ok, that last thing has nothing to do with Christmas, and everything to do with being pregnant :)  I can ‘t believe this is my last Christmas without kids!  Crazy!

Sheet Music Star


Photo Dec 16, 9 37 41 PM


At my most recent craft night with some co-workers, one of my friends taught us all to make paper stars from sheet music. They are super easy, and look very impressive.

Materials:

6 pieces of sheet music (or any other paper you would want to use)


large and small glue dots

Directions:

First you need to cut your sheet music into squares. Take all 6 of your squares and fold them diagonally. Then you are going to cut starting at the folded edge until you almost get to the middle. Do three cuts on one side, following a diagonal line, and then a mirror of those cuts on the other side. (see picture) There should be about an inch going down the middle that doesn’t get cut.

Photo Dec 09, 8 56 57 PM


After you have made your cuts, open the pages up. You will work with them one at a time at this point. Take one of your papers and find a center corner. You are going to roll it up and put a small glue dot on the back. Roll the mirrored side up and attach them together.

Photo Dec 09, 8 39 10 PMPhoto Dec 09, 8 36 42 PM

Flip it over and do it with the next set. Keep flipping back and forth until you are done.

Photo Dec 09, 8 37 24 PM

After you have made all six, you will be attaching three of them together. First lay them out so they are all “facing” the same direction. If you look close you can see one side is more “open” than the other. (see picture) Attach the bases with a large glue dot. Then attach the sides of the three pieces with small glue dots.

Photo Dec 09, 8 51 28 PM with instructions

Do the same thing with the second set of pieces. Then you are going to attach the two halves together. Use a large glue dot to put the two bases together, and then attach the sides using small glue dots.

Photo Dec 09, 8 55 18 PM

Then your star should be all put together! Put in a pretty place and enjoy :) Just to warn you, making them is slightly addicting.

Photo Dec 09, 8 55 34 PM